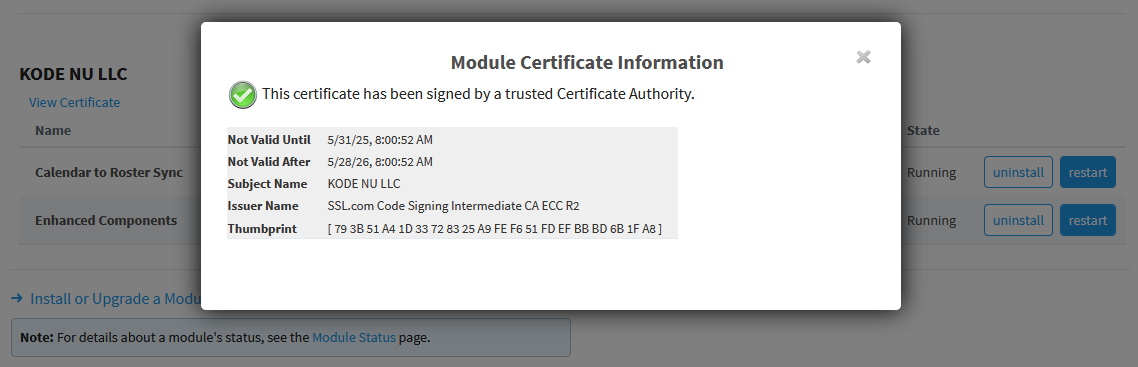
When creating custom modules for Inductive Automation’s Ignition platform, developers have the option to sign their modules with a Code Signing Certificate to validate the authenticity of the module. Gateway administrators are then presented with the certificate details upon installing or upgrading a module. It should be noted that signing your module is not mandatory and has no impact on the module’s functionality outside the installation process, however, signing does provide a higher level of confidence in external code that administrators may seek in highly-secured industrial control environments.
In this post you will learn how to obtain, configure, and sign modules using a Code Signing Certificate issued by SSL.com.
Purchasing a Code Signing Certificate
SSL.com provides Code Signing Certificates for a reasonable price and the verification process with them is efficient and straightforward. Certificates can be issued to either organizations or individuals, and depending on which option you select, the documentation you are required to provide for the identity verification process may differ slightly. After placing your order, expect to receive your certificate within a few business days (unless you opt for expedited processing).
Obtaining & Configuring a Hardware Token
A FIPS-140 hardware token is required to be able to store your certificate on. In this example, we’ll be using a YubiKey 5C NFC FIPS. Depending on the Certificate Authority you acquire your certificate from, they may ship you a USB token with the certificate already pre-loaded for an additional fee which simplifies things to some degree.
Assuming you already purchased your own FIPS-certified YubiKey, you’ll need to perform the attestation process which is outlined here. In summary, you’ll need to:
- Create a CSR in Slot 9a and provide any Subject.
- Select ECCP384 as the algorithm.
- Generate an Attestation Certificate, which verifies that a private key has been generated on a YubiKey:
- Windows:
.\ykman.exe piv keys attest 9a C:\Folder\Folder\attestation\attestationfilename - Linux (Ubuntu):
ykman piv keys attest 9a ATTESTATION-FILENAME.crt - macOS:
./ykman piv keys attest 9a ATTESTATION-FILENAME.crt
- Windows:
- Export the Intermediate Certificate from slot 9F:
- Windows:
.\ykman.exe piv certificates export f9 C:\Folder\Folder\attestation\intermediatefilename - Linux (Ubuntu):
ykman piv certificates export f9 INTERMEDIATE-FILENAME.crt - macOS:
./ykman piv certificates export f9 INTERMEDIATE-FILENAME.crt
- Windows:
- Uploaded the Attestation and Intermediate certificates to your order and request the Code Signing Certificate to be re-issued.
- This is necessary if you ordered your IV/OV certificate by itself and declined to have a hardware token shipped to you by the CA. By default, the certificate is only available to use via the eSigner Platform, which is cloud-based and outside the scope of this post.
- Once the certificate has been re-issued, download the following two files from the CA:
- DER certificate format for YubiKey import
- p7b certificate format for use in the module-signer utility
- Import the .DER to Authentication Slot 9a using the YubiKey Manager application.
Install & Configure OpenSC
You’ll need to install OpenSC to your development machine to make its PKCS#11 driver available to the module-signer utility. Refer to their Quick Start Guide for details.
After installation is successful, create a yubikey.cfg file with the following contents:
name = OpenSC-PKCS11
description = SunPKCS11 via OpenSC
library = C:\Program Files\OpenSC Project\OpenSC\pkcs11\opensc-pkcs11.dll
slotListIndex = 0
This allows the module-signer utility to sign the module using the private key stored on the hardware token. Remember, the private key only resides on the YubiKey and cannot be exported or otherwise used without the physical device itself.
Verify YubiKey
Run the following command to verify that your yubikey.cfg is working properly:
keytool -keystore NONE -storetype PKCS11 -providerClass sun.security.pkcs11.SunPKCS11 -providerArg "<path-to-config>\yubikey.cfg" -list
Enter your YubiKey’s Certificate PIN when prompted, and ensure the keystore returns a single “Certificate for PIV Authentication” entry as shown below:
Keystore type: PKCS11
Keystore provider: SunPKCS11-OpenSC-PKCS11

Your keystore contains 1 entry

Certificate for PIV Authentication, PrivateKeyEntry,
Certificate fingerprint (SHA-256): XX:XX:XX:..
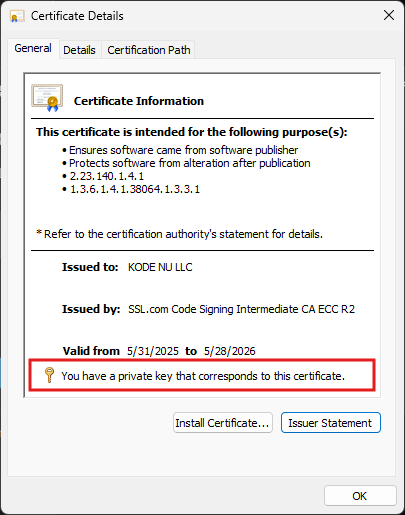
You can also run certutil.exe -scinfo, which will prompt you for your PIN and display your certificate if successful:
IA’s Module Signer Utility
Now that your certificate has been issued and imported to your YubiKey, we can proceed to sign our first module.
Inductive Automation provides a useful utility called module-signer which does exactly what its name implies. The latest official release dates back to 2019 and lacks some out-of-the-box functionality and documentation for signing with certain certificates. We have forked the repository and have a pending pull request that incorporates some minor quality of life changes, so for the purposes of this post we will use the version with our recent changes which can be downloaded from GitHub.
You will need to compile it using Maven (mvn package) to generate the necessary JAR file with dependencies.
java -jar .\module-signer-1.0.0-SNAPSHOT-jar-with-dependencies.jar \
    -pkcs11-cfg="<path-to-config>\yubikey.cfg" \
    -module-in="<path-to-module>\build\Module-Name.unsigned.modl" \
    -module-out="<path-to-module>\build\Module-Name.signed.modl" \
    -chain="<path-to-chain>\my-code-signing-cert.p7b" \
    -alias="Certificate for PIV Authentication" \
    -keystore-pwd="123456" \
    -algo="SHA384withECDSA"
| Parameter | Value |
|---|---|
| pkcs11-cfg | Your YubiKey configuration file contianing the OpenSC driver |
| module-in | Your unsigned .modl file generated by your module’s build task |
| module-out | Your resulting .modl file, signed and ready for distribution |
| chain | The .p7b certificate chain file you downloaded earlier |
| alias | Always “Certificate for PIV Authentication” in the case of a YubiKey with the certificate in slot 9a |
| keystore-pwd | Your YubiKey’s Certificate PIN (123456 from the factory) |
| algo | The algorithm to sign with (“SHA384withECDSA” if using the SSL.com-issued certificate) |
If successful, the utility should output a single Module-Name.signed.modl file which is ready for publishing/distribution.